
So what did I do to have this you may ask, conversion is the answer! This has been a somewhat involved project lasting a few evenings and most of yesterday afternoon.
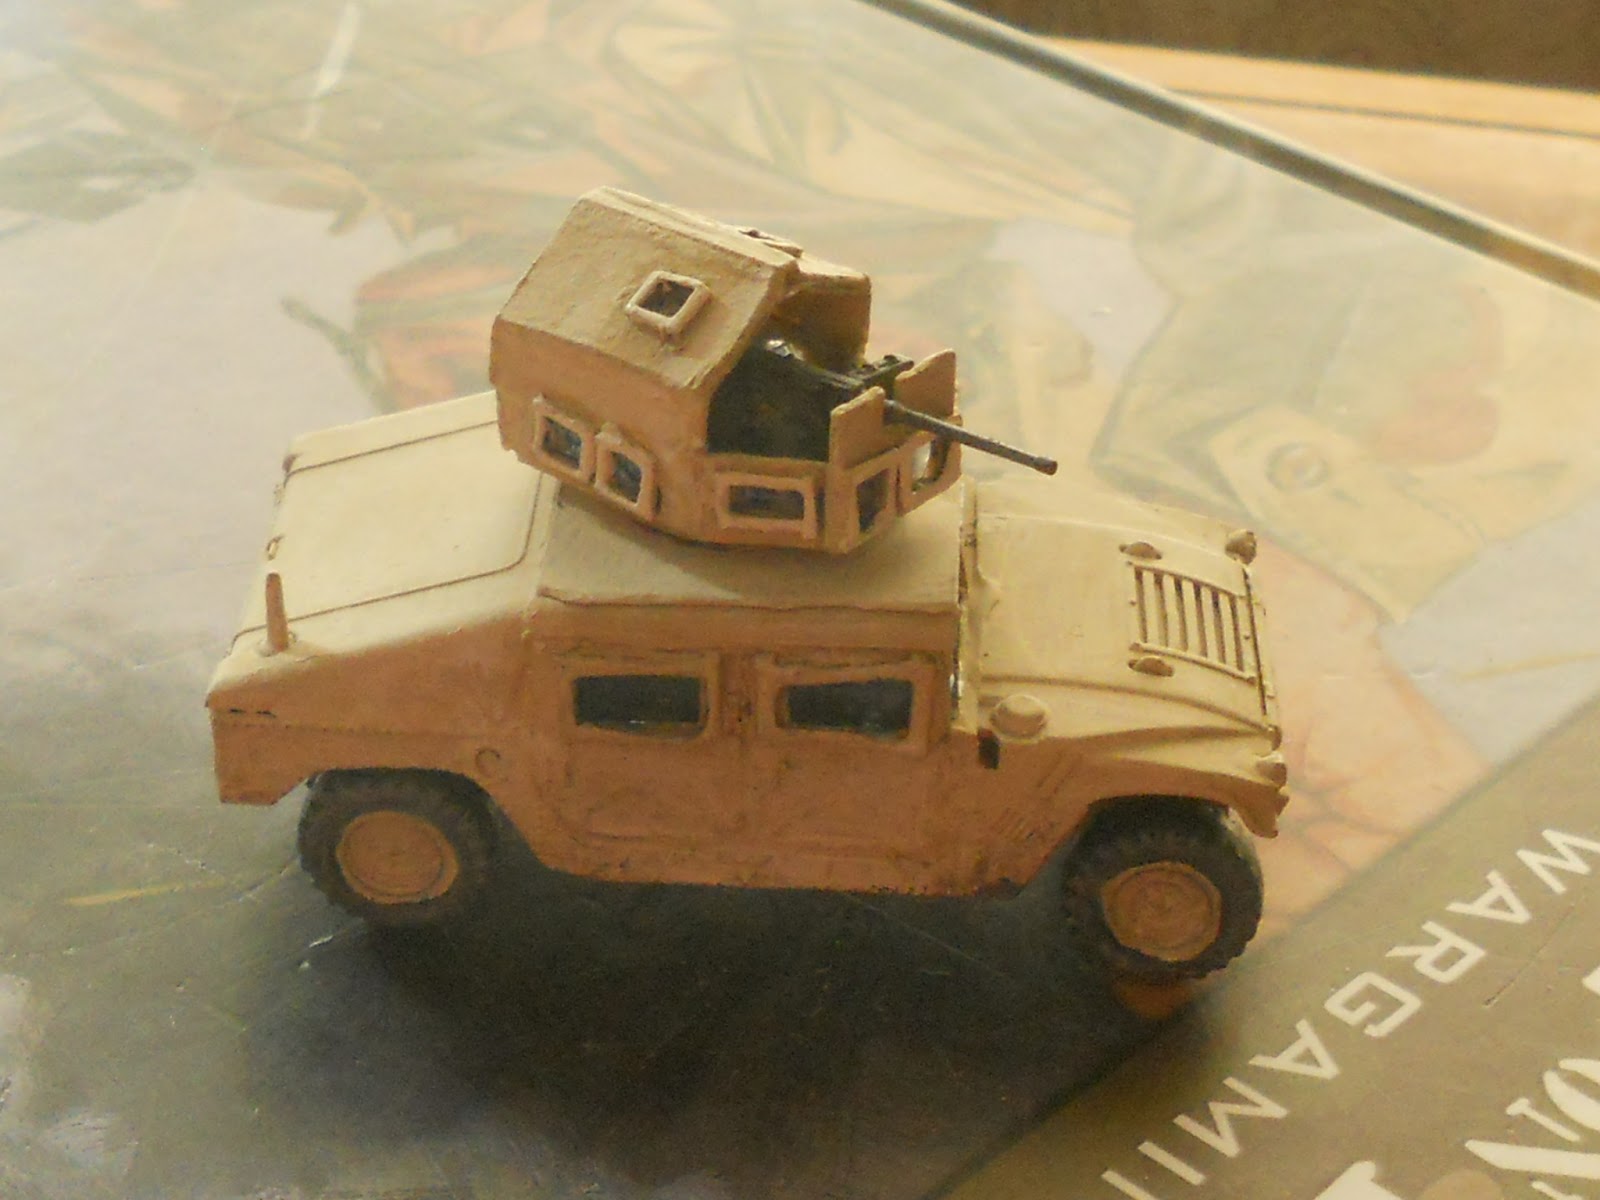
Next up was the Objective Gunner Protection Kit, or (O-GPK). This is an extra armored little turret on top of the truck with a heavier weapon on it. I built this specific model with a roof on it which is just one of tha many options and variations with HMMWV turrets.
I made these with the original TOW turret ring (with the controls and all shaved off) with a card floor on it, like the below picture.

Next up were the walls. These are somewhat thin steel plates with very thick, framed bulletproof windows. decided that I would make the walls from the same card I used earlier, then cut window slots in that then add the clear sheet plastic after it was solid. This resulted in the part seen below the white bit of paper in the picture below.

Here are some pictures of different angles. Note, I sill had not framed the windows in on the sides.


 |
| A test fit. |
I then painted the entire model in Khaki with the usual highlights etc.


I do like them, good work and the shield looks fantastic! I am very impressed with how good the shield looks when it is scratch built.
ReplyDeleteThanks Gowan, I'm happy with it, but I would be more happy if a kit existed :D
DeleteReally well done Ben, good use of skills all around.
ReplyDeleteThanks Paul!
DeleteExcellent Work, Ben. Looks like the real deal.
ReplyDeleteThanks Steve! I think it could use an extra layer of armor all around it, but I wasn't up to all that after three days of just the turret.
DeleteI actually finished a second one after this, I'll have to post it in the future. This one has the O-GPK w/shield but no roof. To top it all off I put a 40mm AGL in it :D
It should add a little more protection in an ambush.
Great work there Ben
ReplyDeletePerhaps this will save you a lot of work in the future.
Just click through the links.
http://www.network54.com/Forum/47210/message/1402342442/Are+the+turrets+separate-
Thanks. Maybe I'll get one (or more) when they're released.
ReplyDelete